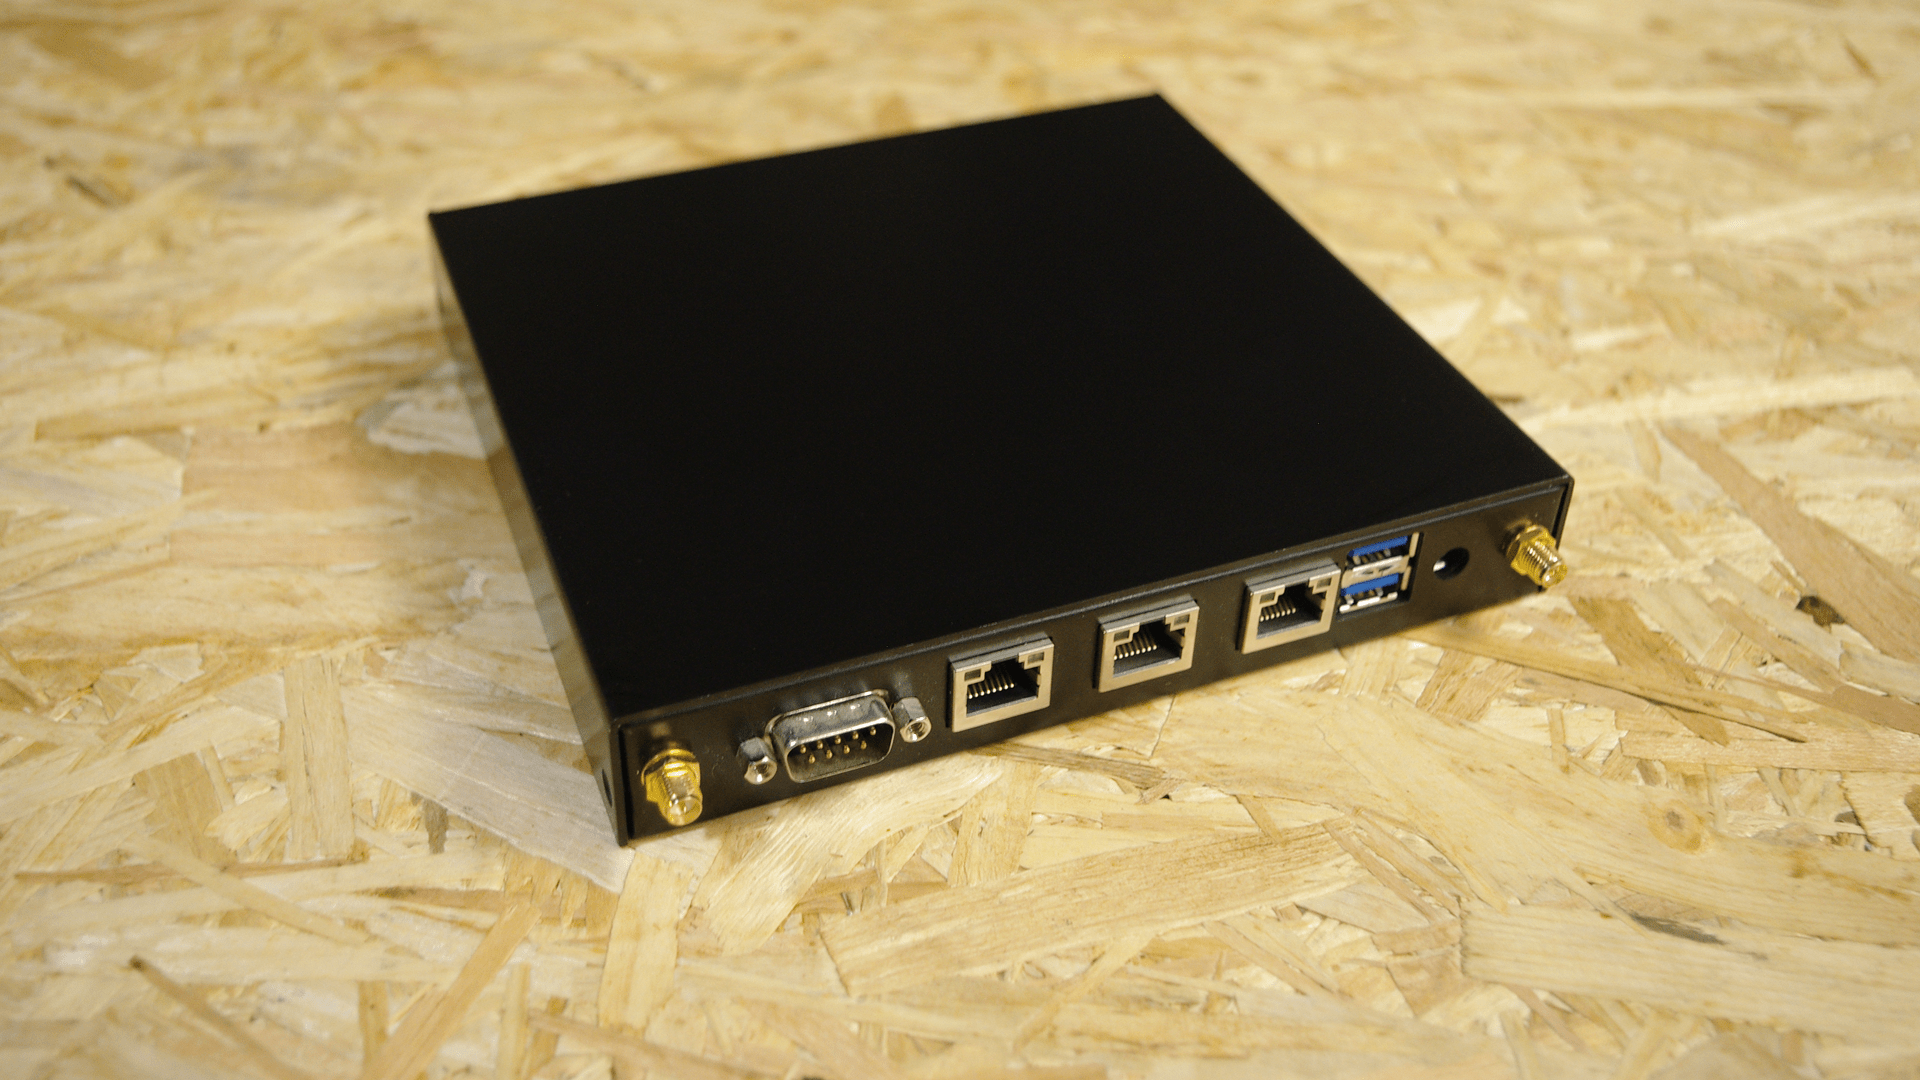
The single-board computers by PC Engines are really good devices suited for home or office servers, firewall applications, and alike. The three Gigabit Ethernet ports, three MiniPCI Express ports together with an AMD powered x86_64 CPU and low power consumption (about 6-10 W) make them especially attractive.
In the following, I will describe how Alpine Linux can be installed while configuring it to enable and use the serial console. This is important as there are no graphics cards in the APU series.
Requirements
For this guide, a PC Engines apu3c4 was used (APU2 board with three Gigabit Ethernet ports and 4 GB of RAM). The system will be installed on an SD card and the first Ethernet port will be used to provide an internet connection, although the setup does not require a network.
For the installation, a USB thumb drive will be used. See the next section on how to copy the Alpine Linux installation image.
Bootable USB thumb drive
For the installation, the standard image of Alpine Linux for x86_64 version 3.10.3 (Released Oct 21, 2019) will be used.
To copy the boot image to a USB thumb drive, the name of the USB device needs to be determined. After that dd can be used to copy the image to that path. This copies the whole filesystem to the USB thumb drive which should be bootable.
In the following sections, the two commands can be used to list storage devices and to copy the boot image to the desired device (the paths for the input file if and output file of need to be changed very likely – be careful).
macOS
# diskutil list
# dd if=alpine-standard-3.10.3-x86_64.iso of=/dev/rdisk2 bs=1m
Linux
# lsblk
# dd if=alpine-standard-3.10.3-x86_64.iso of=/dev/sdb bs=1M
Alpine Linux Setup
Bootup with serial console
Firstly, you need to boot from the USB thumb drive. This can be done by pressing F10 to access the boot menu and selecting the appropriate device by its number.
If the right boot device was selected, something like the following line should be printed:
ISOLINUX 6.04 6.04-pre1 EHDD Copyright (C) 1994-2015 H. Peter Anvin et al
boot:
After the boot: prompt enter vanilla console=ttyS0,115200n8 to enable the serial console for the boot image of Alpine Linux. The command vanilla is the label of the kernel set in the isolinux/syslinux/extlinux configuration of the boot image. The options after that set the console to the first serial console (ttyS0) with baud rate 115200 while using no parity bit and 8 data bits. This is a common configuration for serial connections.
Basic Setup
First, login into the system. By default, the Alpine Linux installer provides the user root with no password set (simply press the Enter key when prompted for a password).
After logging in, the setup can be started with the setup-alpine command. An example for setting up the first Ethernet port with DHCP and installing the system on the SD card looks like follows (three dots indicate omitted output):
Select keyboard layout [none]:
Enter system hostname (short form, e.g. 'foo') [localhost]: iot-box
...
Which one do you want to initialize? (or '?' or 'done') [eth0]
Ip address for eth0? (or 'dhcp', 'none', '?') [dhcp]
Which one do you want to initialize? (or '?' or 'done') [eth1] done
Do you want to do any manual network configuration? [no]
Changing password for root
New password:
...
Which timezone are you in? ('?' for list) [UTC]
HTTP/FTP proxy URL? (e.g. 'http://proxy:8080', or 'none') [none]
Which NTP client to run? ('busybox', 'openntpd', 'chrony' or 'none') [chrony]
...
Enter mirror number (1-46) or URL to add (or r/f/e/done) [f]: 1
...
Which SSH server? ('openssh', 'dropbear' or 'none') [openssh]
...
Which disk(s) would you like to use? (or '?' for help or 'none') [none] mmcblk0
...
How would you like to use it? ('sys', 'data', 'lvm' or '?' for help) [?] sys
...
WARNING: Erase the above disk(s) and continue? [y/N]: y
...
Installation is complete. Please reboot.
DO NOT REBOOT, YET! Otherwise, there will be no serial console upon reboot and you have to configure it by mounting the SD card and editing at least /boot/extlinux.cfg and /etc/inittab on another system.
Configuration of serial console
To complete the setup the serial connection needs to be configured. To do so, first mount the boot partition of the Alpine Linux installation from the previous step. Note: Make sure that you don't confuse the files of the installation medium (USB thumb drive) and the partitions of the SD card.
The boot partition can be mounted as follows:
# mkdir /mnt/boot && mount /dev/mmcblk0p1 /mnt/boot
Then open the configuration of the bootloader (syslinux/extlinux) in the editor of the choice (here, vi is used):
# vi /mnt/boot/extlinux.conf
In the configuration file of syslinux/extlinux, add and edit following options:
SERIAL 0 115200
...
  APPEND root=UUID=8be904ef-d239-1337-b058-f7b9cb1e74c7 modules=sd-mod,usb-storage,ext4 nomodeset quiet rootfstype=ext4 console=tty console=ttyS0,115200n8
The SERIAL option can be the first option. Make sure to add console=tty console=ttyS0,115200n8 to the APPEND option. Note that there are two console options. As the APU does only have a serial console, only one should be enough, but due to a bug where some characters are omitted in the login prompt and therefore the login is not possible, both options are needed. See https://bugzilla.redhat.com/show_bug.cgi?id=691374 for further information.
You probably noticed the comment in the first line of the bootloader configuration /mnt/boot/extlinux.conf:
# Generated by update-extlinux 6.04_pre1-r3
This indicates that the file was generated automatically and the changes of the previous step will be overwritten by update-extlinux. To make our changes permanent, the configuration file needs to be adjusted accordingly. To add our changes to the configuration, edit the following file:
# vi /mnt/sys/etc/update-extlinux.conf
In this file two lines need to be changed:
default_kernel_opts="nomodeset quiet rootfstype=ext4 console=tty console=ttyS0,115200n8"
serial_port=0
serial_baud=115200
Make sure to append console=tty console=ttyS0,115200n8 to default_kernel_opts and to set serial_port to 0 (was empty and therefore disabled by default). Also, make sure the option serial_baud is set to your desired baud rate (default is 115200).
Next, the serial console needs to be enabled as a valid console. To do so, edit the inittab file:
# vi /mnt/sys/etc/inittab
# Put a getty on the serial port
ttyS0::respawn:/sbin/getty -L ttyS0 115200 vt100
...
# enable login on alternative console
#ttyS0::respawn:/sbin/getty -L 0 ttyS0 vt100
Uncomment the line where ttyS0 is defined with the baud rate and comment out the line with ttySO where no baud rate is specified (maybe the last edit is not needed, but so far it works for me).
A last edit may be necessary to check that ttySO is in the file /mnt/sys/etc/securetty:
# vi /mnt/sys/etc/securetty
Now that the configuration is complete, the system can be rebooted:
# reboot
Make sure you boot from the SD card and not from the USB thumb drive.
Finally, after logging in run:
# update-extlinux
Verify that /boot/extlinux.cfg now contains the right settings that were generated (e.g., SERIAL is still set and APPEND contains console parameters).
Congratulations! Now you can proceed setting up Alpine Linux and use it as intended while the serial console should be available.
Further resources
- https://wiki.alpinelinux.org/wiki/Enable_Serial_Console_on_Boot
- https://www.fwaggle.org/sysadmin/apu/alpine/install/
Did you find an error? Do you have questions, suggestions, or simply want to say thanks? Write me an email!